
The Bits
Now when it comes to the actual engraving bits, there are an incredible amount of different types. However, in this article, we'll simplify things and go down to two basic ones - metal and plexi.For steel/aluminium engravings, I always use diamond bits since these give a great result and they are very durable. There are all kinds of different sizes but there are three basic bits that gets you started in a good way.
When doing plexiglass engravings you can use the diamond bits, but I like to use a different kind of bit since I like to play around with different textures. Therefore, I use a cutting bit, instead. Since plexi is a lot softer than metal, you can do some very cool things indeed with cutting bits.
As I mentioned, there are the three bits that I mainly use for Steel and aluminium - these are Dremel Original part numbers 7103, 7105 and 7134. With these three bits, you can get just about anything done. For plexiglass, I use part numbers 105, 106 and 107. We will check out what can be done with these bits later in this guide.
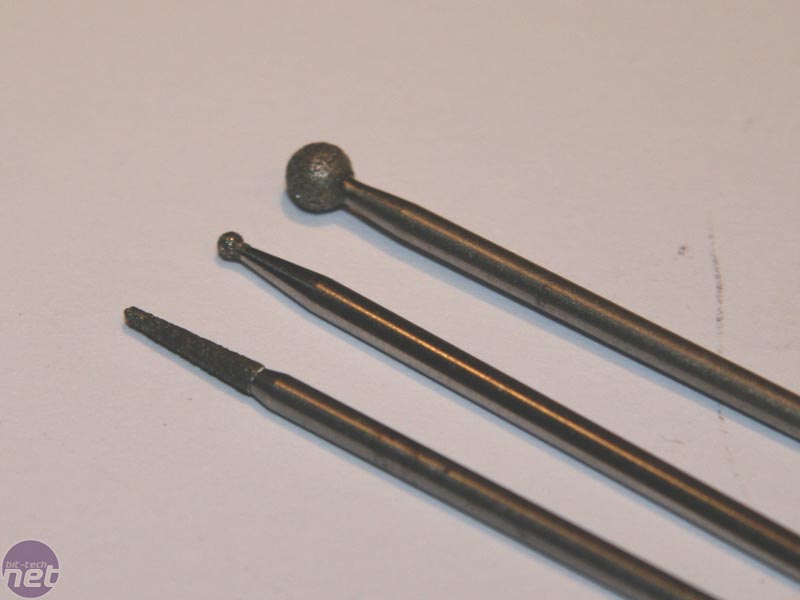
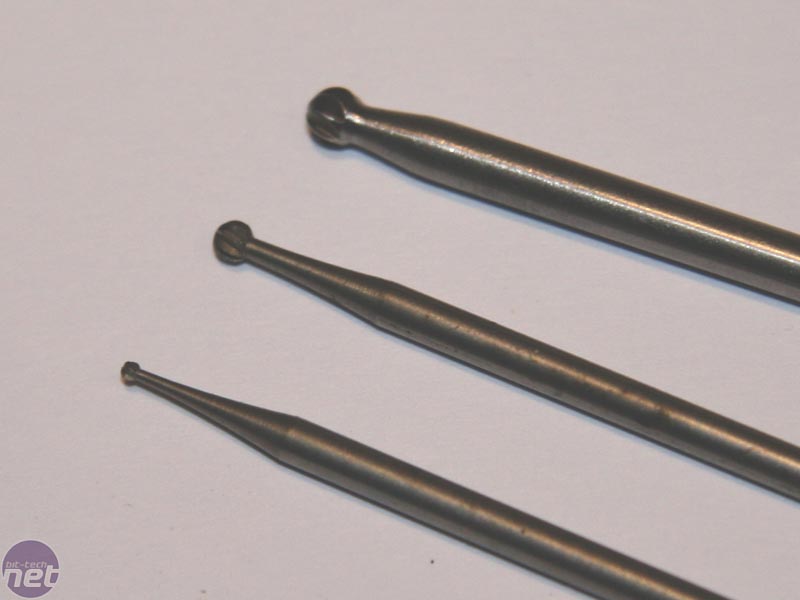
Left - Steel and aluminum bits; Right - Plexiglass bits.
Designs
So now that we have the basic engraving kit sorted, its time to go and choose your design and get it on the case. There are a few different ways to do this, and I'lll explain a couple of them. Of course, which design you choose isn’t for me to say - but I can tell you about how you can get good results with whatever design you choose.First, if you are a bit artistic then you can always just use a marker and sketch your design straight on to the case by freehand. Of course, not all of us are quite that artistic - so for the rest of us, the easiest way is to print the design and then use carbon paper to get the design onto the case. I use Pelican Plentycopy carbon paper for almost every one of my designs, even for the ones I make myself. After all, it's easier to draw on paper than the hard shape and curves of a case!
This copy paper works really well and can be used on anything, from aluminium and steel to plexi. You simply print your design, put the carbon paper where you want it, and trace it with a pencil. This gives you nice, clean lines to follow.
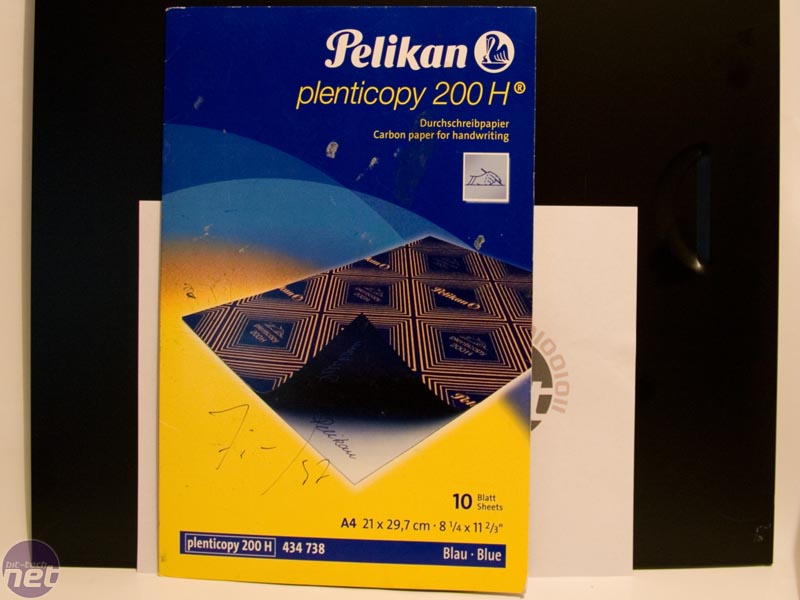

Left - How I get good clean sketches on whatever surface im going to engrave; Right - My design printed and ready for tracing.
Using this method takes a bit of time, but it will give you the best lines. There is a faster way though, and that’s the technique used by my brother in arms Mikael Gustavsson (aka GoTaLL). The technique sounds simpler by far - just print the design, tape it on the case, and engrave right through the paper. This method can be a bit tricky though if you are doing very complex designs, since it basically shreds the paper as you go.
Again, It all comes down to what works best for you, but I myself always do the carbon paper. It takes more time to prepare the engraving, but its a lot quicker once you start because you have exact lines to follow.
RELATED ARTICLES


MSI MPG Velox 100R Chassis Review
October 14 2021 | 15:04


Want to comment? Please log in.