Setting up a network share in Windows 7 (public)
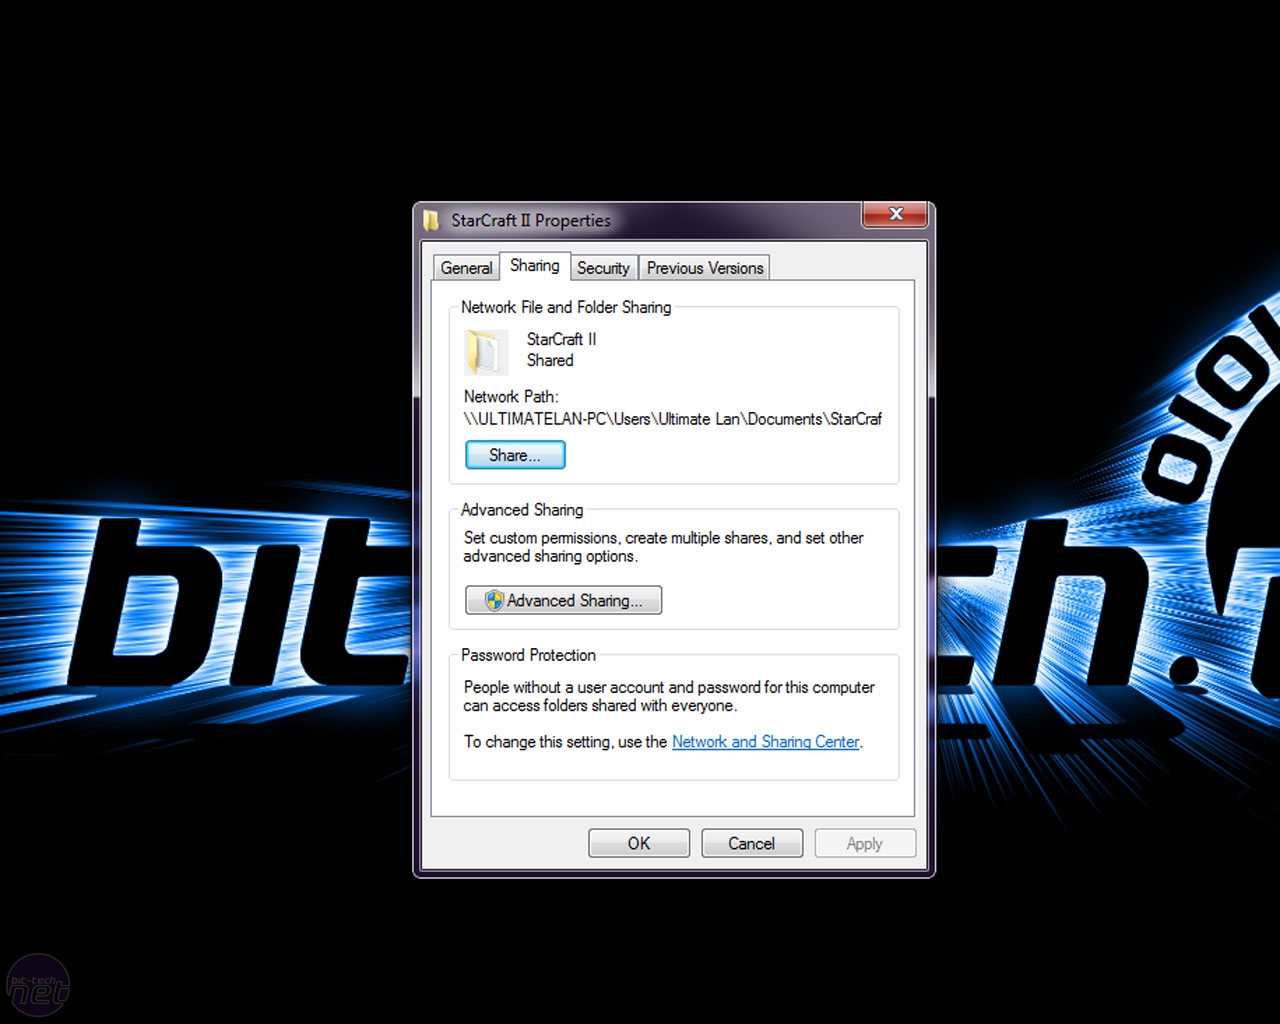
When you share a folder in Windows 7, you need to ensure that it has the correct permissions for each user that will try and connect to it. Ideally you’ll want users to be able to read the contents of the folder but not to be able to change the contents, leaving you to manage your shares from your PC. The simplest way to do this when sharing a folder is to add the user 'Everyone' to the folder permissions and give that user read access. Here’s how:- Right click on the folder you want to share and click properties.
- Select the Sharing tab and click Advanced Sharing.
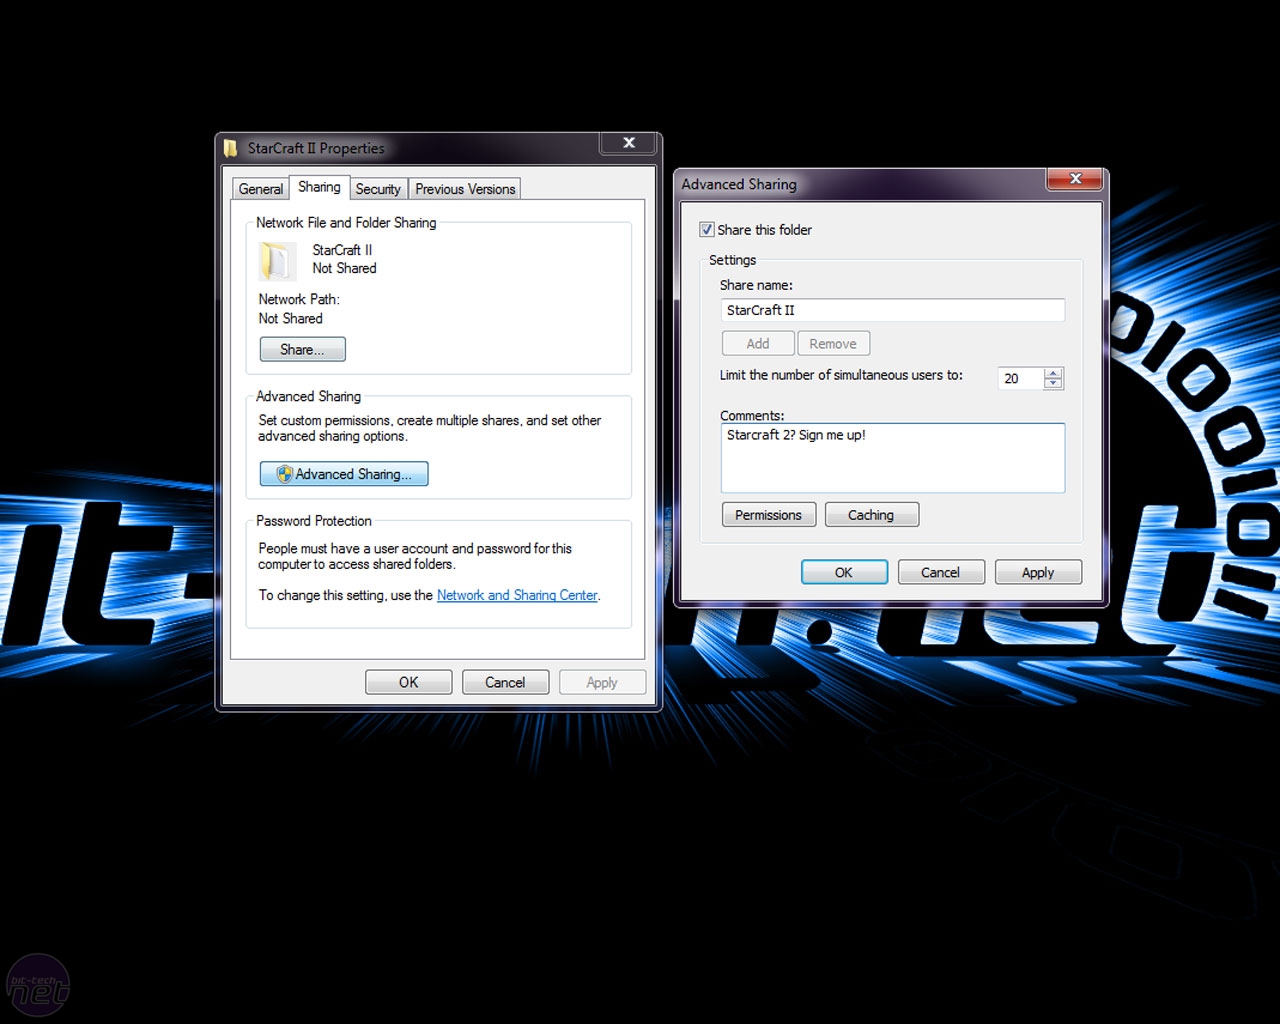
- Tick Share this folder.
- You can set a share name for the folder that is different from the folder’s actual name. The share name is how it will appear to somebody browsing the network. You can change this if you wish.
- Click Permissions.
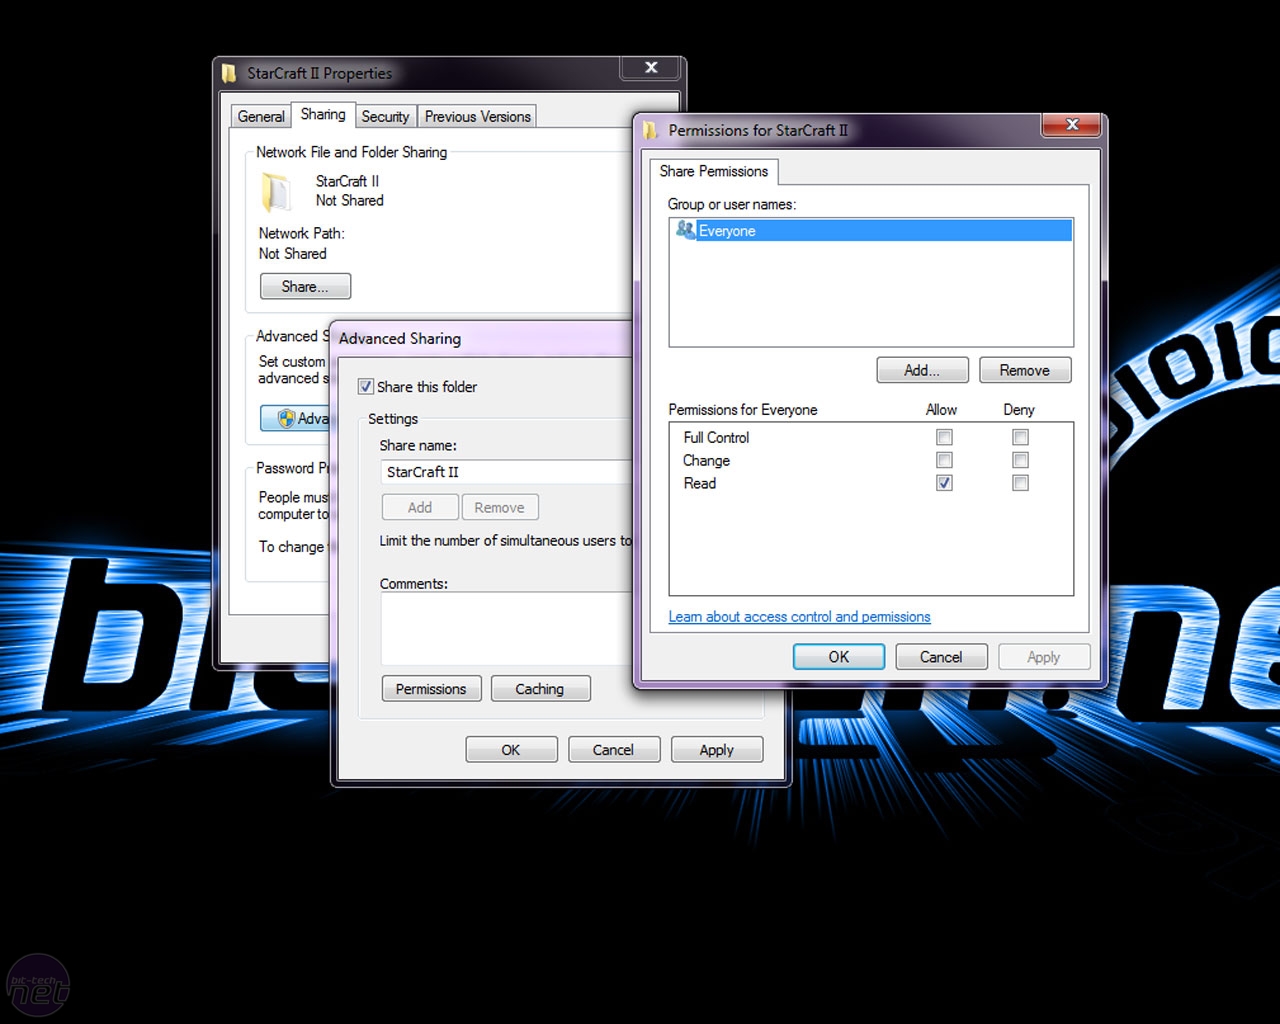
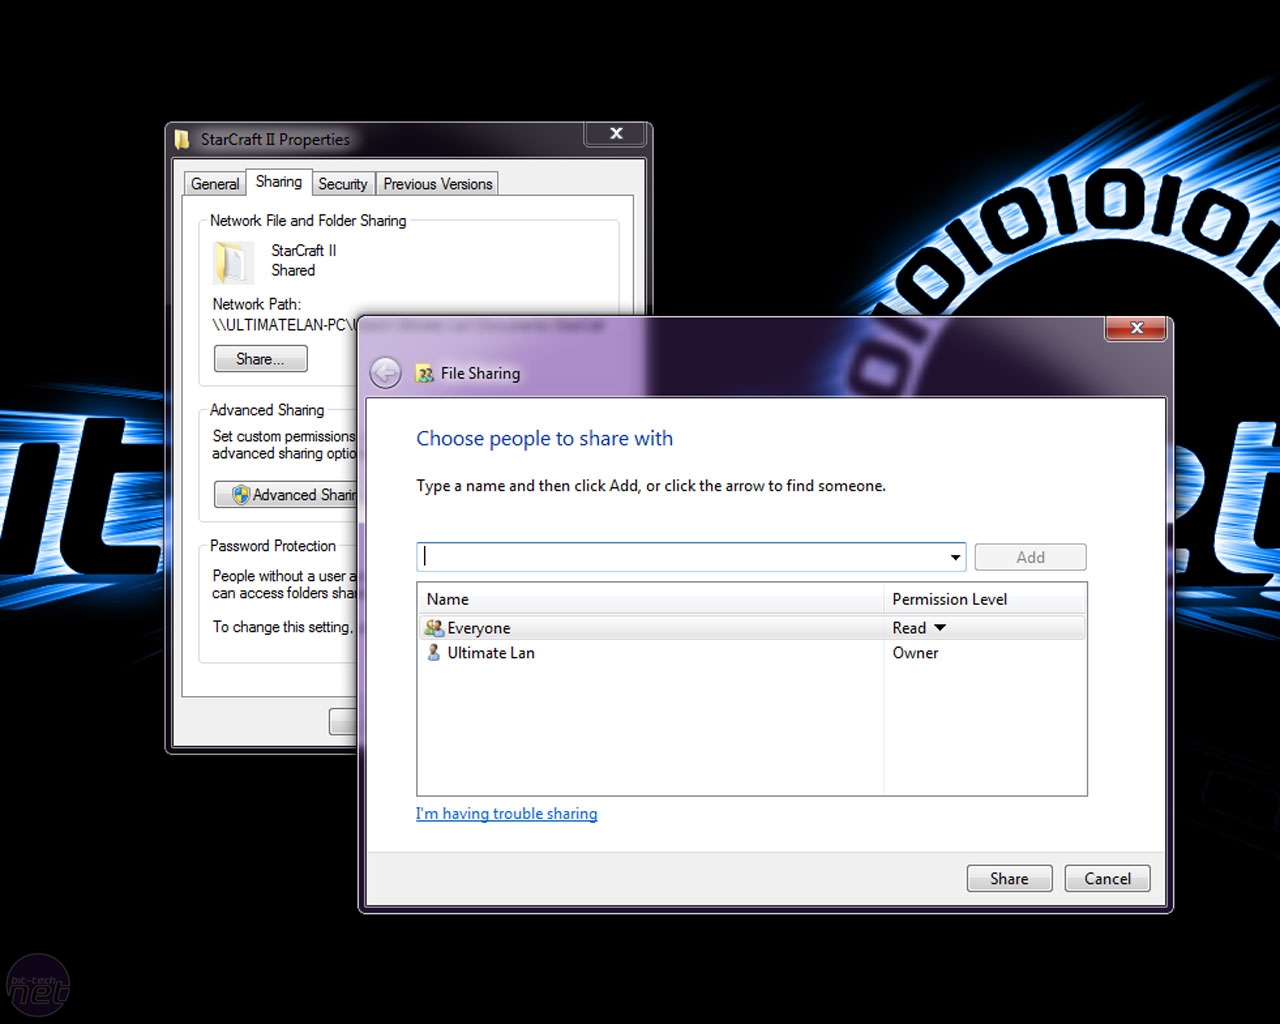
- Select the user, Everyone. If the user is not there, click on add, type “Everyone” in the names field, click Check Names and click OK.
- With Everyone selected, tick the Allow Read box and make sure all other boxes are left blank. Click Apply.
- Click OK, Apply and then OK again. You should now be back to the folder properties window.
- With the Advanced settings in place, you'll also need to set the standard settings. Select the Share tab.
- Now, in the same way as the advanced settings, add Everyone as a sharer, with read only access. Then select share and done.
- Your folder is now shared
Click to enlarge
Click to enlarge
Again, be aware that this configuration is best used on a secure home network, where you won't mind anyone reading your files.
You can now play the contents of that folder with your media streamer. Fire up your media streamer and start browsing the network. You need to select the workgroup of your PC, then the PC on which the shared folders are hosted on and then the folder itself. If you've done everything correctly, you'll be able to connect to your share without being prompted for any login details.
Setting up a network share in Windows 7 (private)
Of course, you may not want to set up a share for everyone on your network, especially if you live in shared accommodation, want to add write access, or are particularly security conscious. A good practice then is setup a password protected "share" account on your PC with which to login remotely, a process that is quick and easy.- Click the start button and then click on your Windows profile picture.
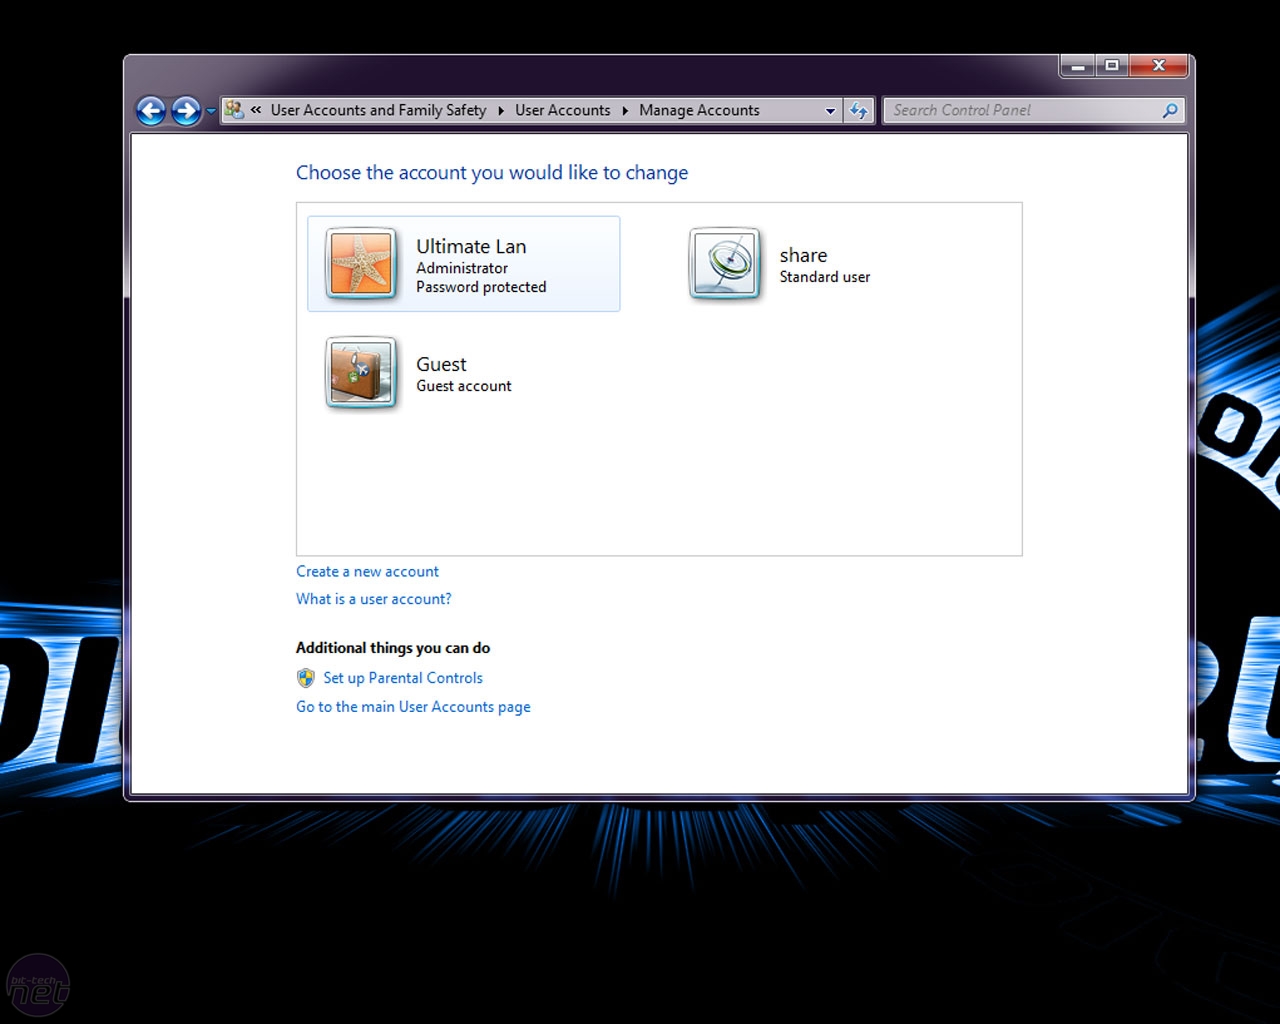
- Select Manage another account.
- Click Create a new account.
- Enter the New account name as “share”, select Standard user and click Create Account.
- Click on the share user’s picture and then click Create a password.
- Since this account is a standard user, it won’t be able to do any damage to your system, but will still be able to access shared files securely
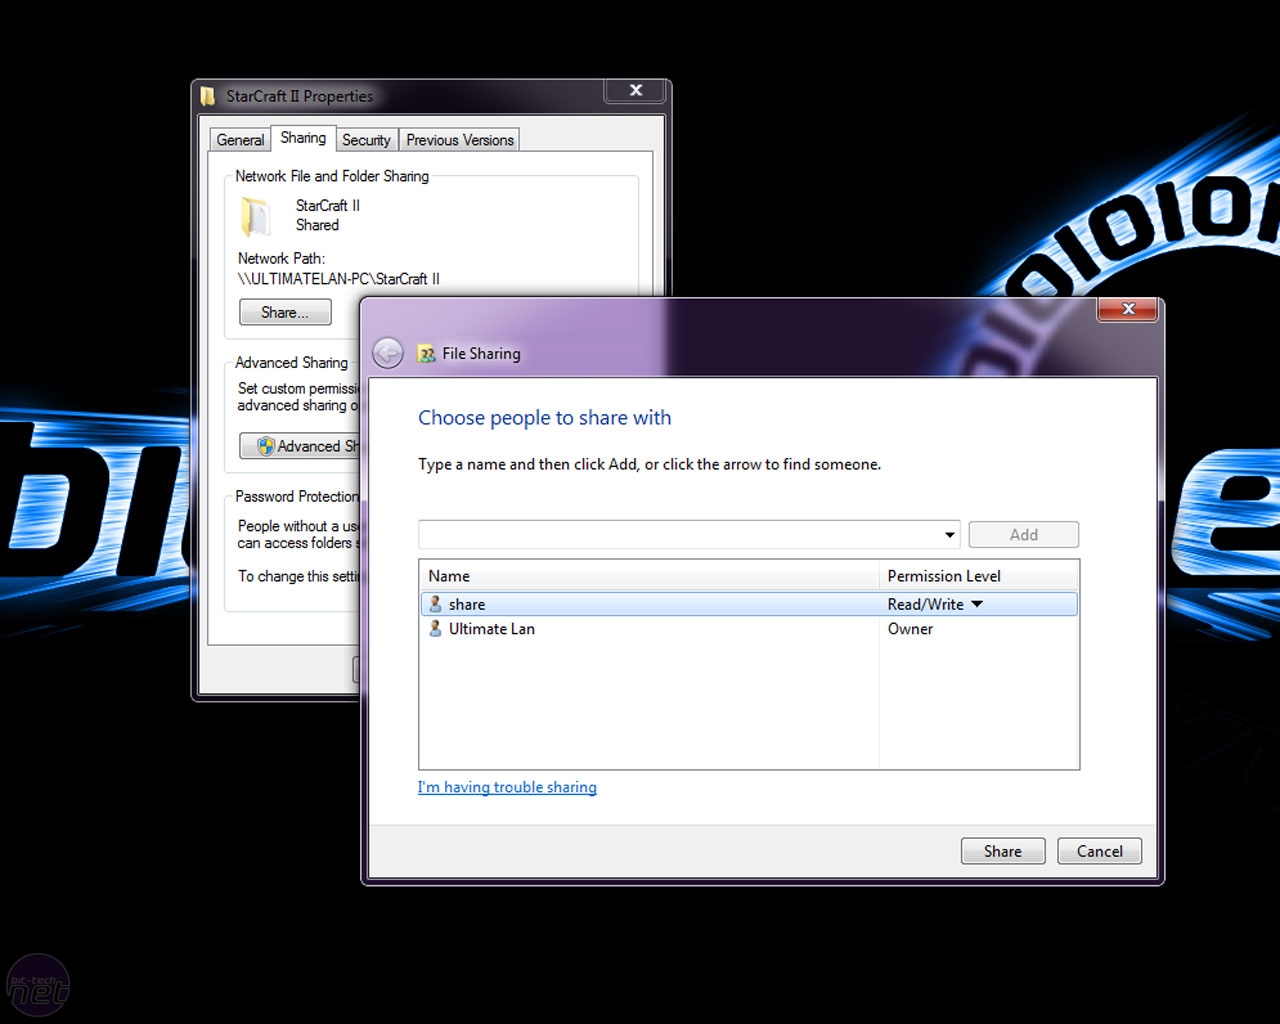
- Now repeat the "setting up a share" process above, but instead of adding "Everyone" as a recipient, select your share account.
Click to enlarge
While these are the standard procedures for setting up a network share inside Windows 7, the perfect match for a media streamer is a NAS box. However, the process for setting up network shares is different for each NAS box so you’ll want to consult the manual for a for thorough walk-through.
Hopefully this guide will help those looking to add a media streamer to their network. Happy viewing!
RELATED ARTICLES


MSI MPG Velox 100R Chassis Review
October 14 2021 | 15:04


Want to comment? Please log in.