
Begin the Res Build
After sourcing your hardware and tools, the first thing you want to do in building a res is to cut out all of your parts, then sand whatever needs sanding, drill whatever needs drilling, before tapping any thread holes.You want to do all of this first so that you don't get any debris stuck in the reservoir once it's together, and you will need the barb holes to feed through to get solvent into at least one end. With experience it took me less than 1.5 hours to cut all of the pieces, sand all of the edges, and drill and tap the holes, so practice of technique certainly benefits in the long term. If you can use laser precut ends, it would save probably 30 minutes on top of this.
To cut the cylindrical piece of cast acrylic, I used a compound miter saw with a plywood blade. You can also cut this by hand with a simple $15 miter box. The cut really needs to be perfectly straight. If cutting with a power miter saw, don't try to cut straight through the acrylic: cut a bit at a time. Remember, acrylic doesn't like heat so cutting in an up and down quick chopping fashion bit by bit keeps the heat under control because there’s less friction. I used 20-30 small up and down chops to cut the end.
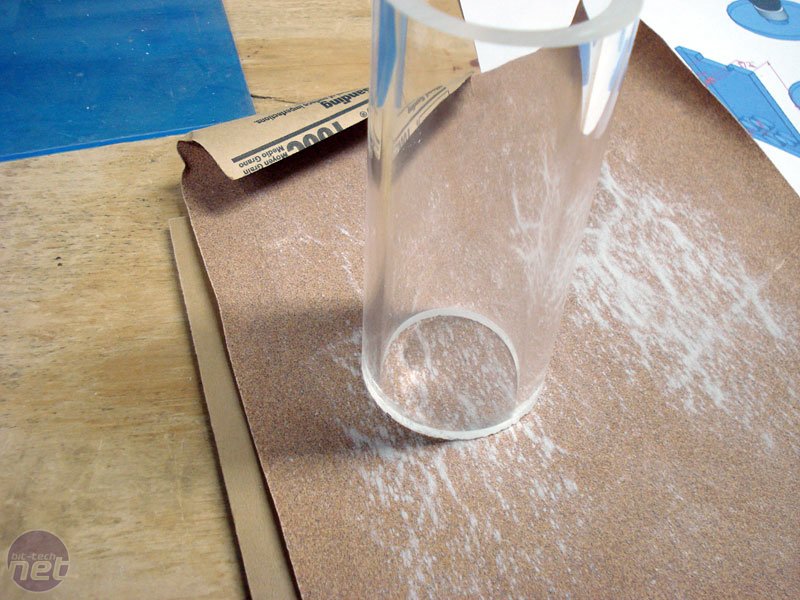
Once cut, you need to get rid of all of the saw marks. I do not recommend using any power sanders for this. They tend to heat up the acrylic too much that causes crazing when solvent welding. I sand the ends smooth by hand using a flat surface and simple elbow grease. I slowly rotate the tube as I sand. I recommend sanding all the way to 400 grit from a course 100: 100, 150, 220, 400. It took me about 30 minutes to sand smooth both ends smooth and it’s worth taking your time here. How well your joints capillary weld depends on how flat and smooth your ends are.
Click to enlarge
Barbs
On every other res I have made, I used 0.375in NPT – 0.5in (0.375in threads x 0.5in barb) plastic barbs that I bought from ACE hardware. A 0.375in NPT tap to cut the thread holes can be bought for just $5: get one. NPT are tapered threads, and you would want to use plastic barbs to minimize the stress placed on the acrylic by the tapered holes with barbs tightened in them. If you try to put a brass tapered barb in a tapered hole in acrylic, you will probably cause it to crack and craze. A bit of RTV silicone sealant on top is all that is needed to seal them up completely.On this reservoir, I bought a G-0.25in thread tap from mcmaster as item number 8328A22 (search for G-0.25in-19 BSPP thread tap) - it sells for around $17 + shipping. The metal barbs used for watercooling most of us know use G-0.25" British Standard Parallel threads. This really is an even better solution for using with acrylic as putting a parallel threaded barb into a parallel threaded hole causes virtually no stress on the acrylic surrounding the hole.
Tapping Holes
If you have tapped holes before, just skip this section, however in case you never have, when tapping the holes, you first drill a hole with the required size. G-0.25in technically call for an 11.8mm (.46in) hole, but a 0.4375in (.44in) bit works fine. I recommend using a wood spade bit over a forstner type bit as wood spade bits don't heat up the acrylic nearly as much as forstner bits do. You then insert the thread tap, spray it with some kind of lubricant (I use spray silicone), and keeping the tap perpendicular to the hole work the tap back and forth gently cutting a bit more thread each time with each turn. I take about a quarter clockwise, then counterclockwise just a bit, then another quarter turn clockwise, back a bit, and so forth. Make sure to spray more lube a few times onto your tap and in the hole. Once the thread tap stops cutting, thread it all the way through and back out of the hole, and then thread it through the other side to clean up the threads.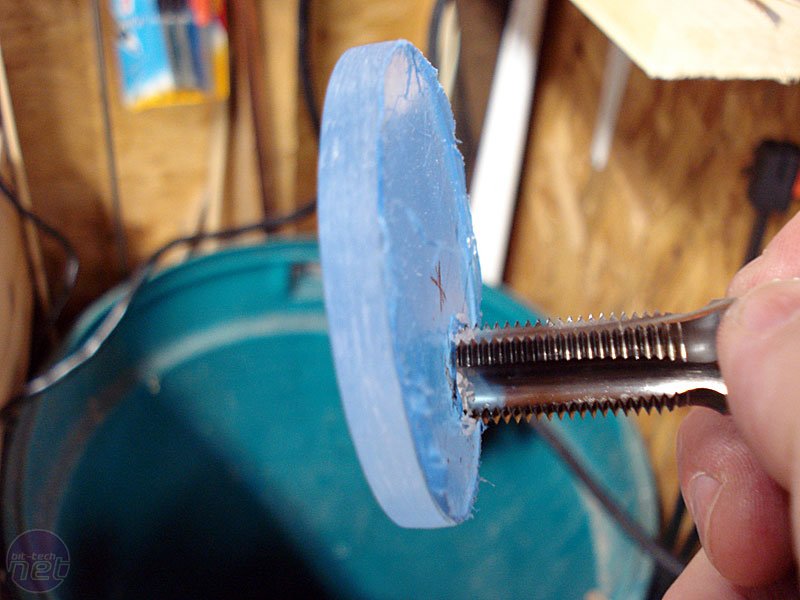
Click to enlarge
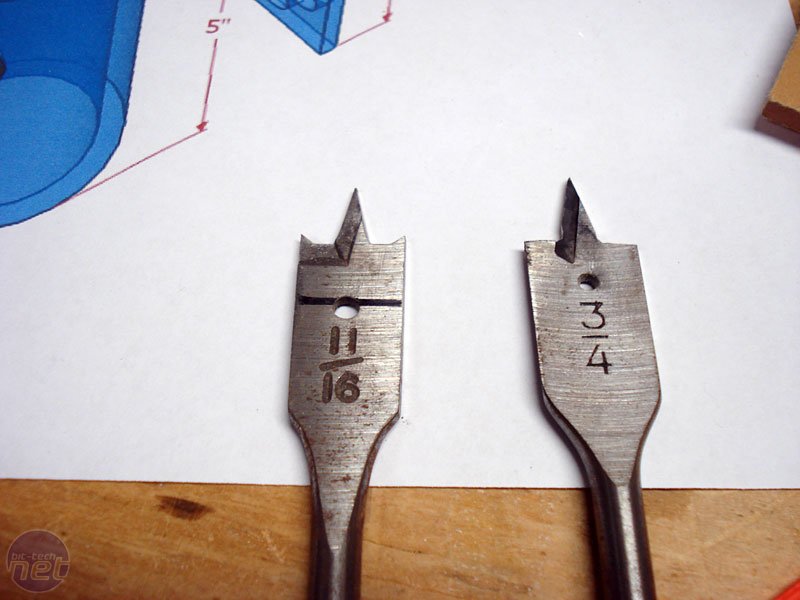
On the side inlet, because of the curved surface I had to use a bit of a different approach. I used a Bitspower 45 elbow which needs a flat surface for the o-ring to seal to. I took a regular 0.75in wood spade bit and using a grinder ground the side cutting surfaces to be flat. This way the hole would be flat and wouldn't go any deeper than I wanted.
Click to enlarge
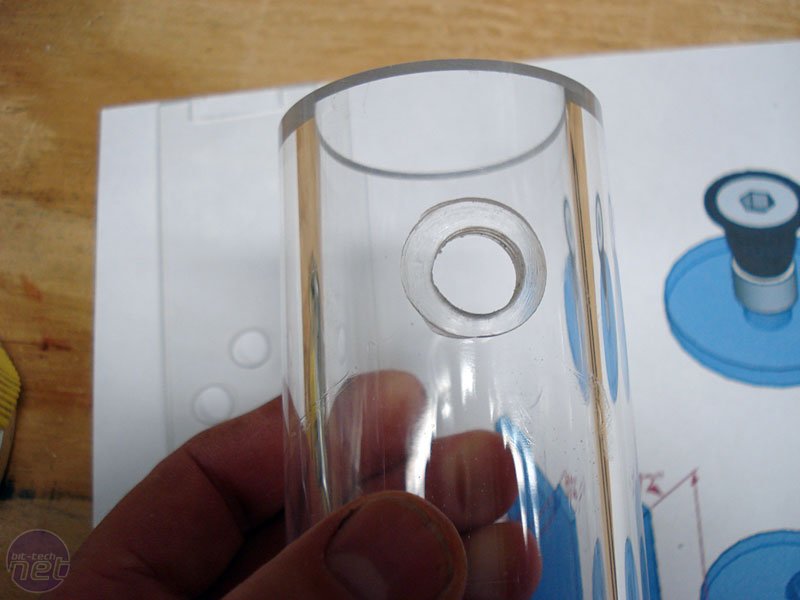
I clamped the tube onto a piece of 2 x 4in wood to keep it steady, and drilled the 0.75in hole in just deep enough until the entire 0.75in markings on the drill bit were touching the acrylic. This way I have a flat 0.75in area before I used a regular 0.4375in spade bit to finish drilling out the middle for the threads.
Click to enlarge


MSI MPG Velox 100R Chassis Review
October 14 2021 | 15:04


Want to comment? Please log in.