
Let's take a step back in time...
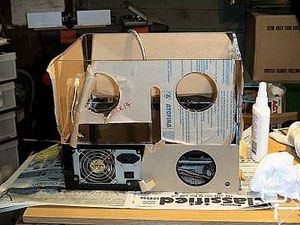
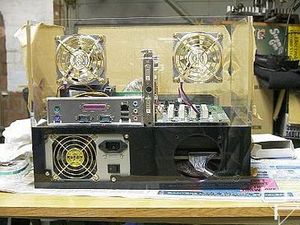
As already said, being pushed for time some stages of construction were not photographed. Here is the top section cut, assembled and fixed in place. The cut outs for the cooling fans, VGA card and motherboard I/O panel were done with the router. Darn handy tool that router!
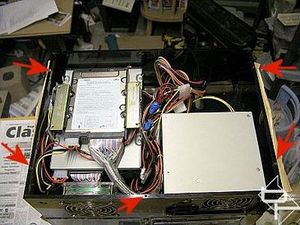
Here final assembly has begun. The drives and PSU are fitted in place.
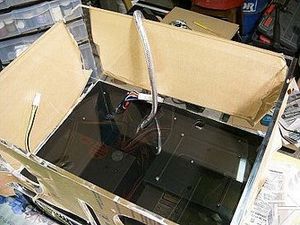
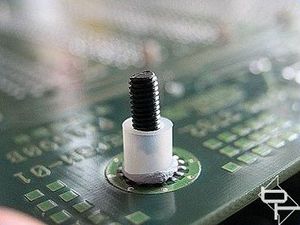
All the cables were passed through the section dividing plate before fitting the motherboard. The motherboard was mounted on nylon spacers and screwed into threaded holes on the section divider. I had originally intended to use the standard motherboard brass stand-offs but unfortunately I did not have a suitable tap to thread the holes and time was of the essence so black anodised 3mm screws were used instead. This proved to be a pain to keep the spacers in place when trying to fit the motherboard. So MrHaz suggested we keep the spacers in place with Blu-tack. What a team!
Some jiggery pokery and lots of cursing later, the motherboard was firmly in place. It pays to make sure all your drilling is accurate. Fortunately ours was perfect!
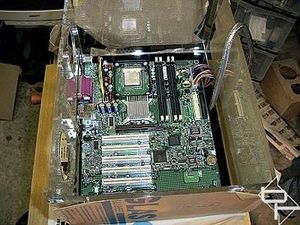
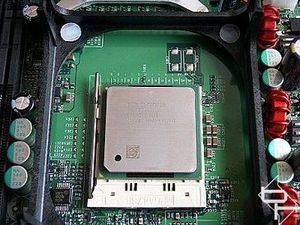
Say hello to the "Intel Pentium 4 Processor 3.06GHz with Intel Hyper-Threading Technology" it is about to disappear under the HSF!
Assembly was starting to take shape. Hmmm, those Titan silver fans with Gold grills, I do like those.
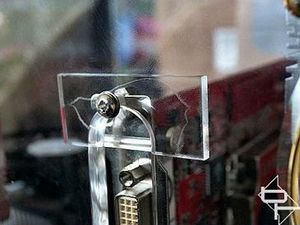
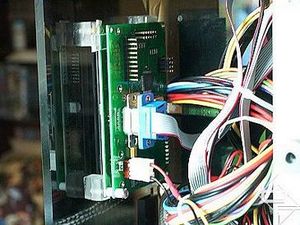
Here is a close up of how the graphics card was secured in place. The top of its PCI plate was bent straight so it could be fastened to the case back with a bolt. The rectangle of 3mm Acrylic was glued in place to take up the slack space and give added strength to the mounting.
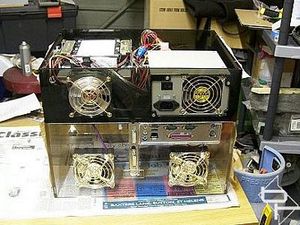
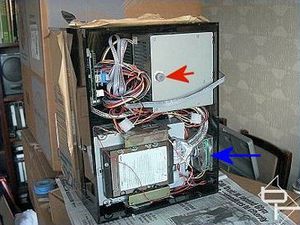
Flipping the case over we see,...the under side! The red arrows indicate 3mm threaded holes, (the Acrylic is only about 5.5mm thick!). The base will be retained with screws using these holes. Four similar holes, (the four side ones), were repeated on the top side to retain the case lid.
Time to tidy up the wiring and...
...fit the Matrix Orbital VFD. The display was bolted into threaded holes in small Acrylic blocks glued inside the case front. The blocks were made up from various thickness layers of Acrylic to be the correct height.
Notice the rubber "foot" stuck to the bottom of the PSU. That is to help relieve some of the weight off the Acrylic rear plate. (This case is to shipped all around the World for shows and we don't want the case cracking). Incidentally, the cooling fan is an Antec Trilight.
As already said, being pushed for time some stages of construction were not photographed. Here is the top section cut, assembled and fixed in place. The cut outs for the cooling fans, VGA card and motherboard I/O panel were done with the router. Darn handy tool that router!
Here final assembly has begun. The drives and PSU are fitted in place.
All the cables were passed through the section dividing plate before fitting the motherboard. The motherboard was mounted on nylon spacers and screwed into threaded holes on the section divider. I had originally intended to use the standard motherboard brass stand-offs but unfortunately I did not have a suitable tap to thread the holes and time was of the essence so black anodised 3mm screws were used instead. This proved to be a pain to keep the spacers in place when trying to fit the motherboard. So MrHaz suggested we keep the spacers in place with Blu-tack. What a team!
Some jiggery pokery and lots of cursing later, the motherboard was firmly in place. It pays to make sure all your drilling is accurate. Fortunately ours was perfect!
Say hello to the "Intel Pentium 4 Processor 3.06GHz with Intel Hyper-Threading Technology" it is about to disappear under the HSF!
Assembly was starting to take shape. Hmmm, those Titan silver fans with Gold grills, I do like those.
Here is a close up of how the graphics card was secured in place. The top of its PCI plate was bent straight so it could be fastened to the case back with a bolt. The rectangle of 3mm Acrylic was glued in place to take up the slack space and give added strength to the mounting.
Flipping the case over we see,...the under side! The red arrows indicate 3mm threaded holes, (the Acrylic is only about 5.5mm thick!). The base will be retained with screws using these holes. Four similar holes, (the four side ones), were repeated on the top side to retain the case lid.
Time to tidy up the wiring and...
...fit the Matrix Orbital VFD. The display was bolted into threaded holes in small Acrylic blocks glued inside the case front. The blocks were made up from various thickness layers of Acrylic to be the correct height.
Notice the rubber "foot" stuck to the bottom of the PSU. That is to help relieve some of the weight off the Acrylic rear plate. (This case is to shipped all around the World for shows and we don't want the case cracking). Incidentally, the cooling fan is an Antec Trilight.


MSI MPG Velox 100R Chassis Review
October 14 2021 | 15:04


Want to comment? Please log in.