Cut the Panels
I won't lie: This is significantly easier if you have access to a plunge saw or similar that can run on a track. While it isn't crucial that things are 100 percent straight and true, it just makes things easier later, and you can do it much faster. A jigsaw does work fine, though, and you can indeed do it by hand too, but it will just take much longer and give you a sore arm.
Begin by marking out the panels. Using a square here helps to keep edges nice and straight. The other great method is simply marking the same distance on both sides of the panel, and drawing a line between the dots. For maximum ease, mark out one of the largest panels first and cut it out, then use that one to mark out the measurements for all the remaining panels. This saves loads of time and makes it more reliable, as you definitely want all your panels to match one another. As long as you make sure the first panel is accurate, the others will follow.


I'm using a plunge saw for the big cuts. Since my mitre saw is a slide compound variety it has long enough travel to cut the shorter edges on this case. Cutting the panels is straightforward enough once they're marked out; just remember to cut on the correct side of the line you've made else the panels can come out shorter by the width of the saw blade.
Cut the Extrusions
If using generic corner braces, simply measure to the same length as the panels and then cut. You'll need to add 45-degree angles to the end so that they can all line up later.
If you're using N-Case or similar, then you need to consider a couple things. The main point is that the panels insert into the extrusions, which means you need to make the extrusions shorter than the panels to take this into account, or your edges will end up way too long.

The easiest way to do this is by grabbing a panel and an uncut extrusion, fit the panel into it, and draw a line where the edge ends. Do the same on the other side and then measure the distance between the lines. That distance is how long an extrusion needs to be. For N-Case 2 extrusions I make them 30mm shorter than the panel edges. I've demonstrated this with a corner piece. It's worth noting that it's better that the extensions are a few mm too long than too short, so I round up. If the extrusions are too short, you'll have gaps between the connectors and then have to adjust the panels, but if they're a bit too long there's basically no difference as the panels sit in a slot, so you have a few mm to play with.


As with the panels, you can use existing extrusions as jigs to cut future ones (always use the same one!), and this means you only need to measure once for each length (so for my case, one extrusion for the length, another for width, and one for height). We're after consistency here, and if all the extrusions are the same lengths relative to one another, you'll be fine. What you don't want are extrusions that are maybe 1mm different in length or you'll have gaps when you put it together!


Use a scriber or a craft knife to be accurate with your cutting line. Marking fluid makes it easy to see the line if the lighting isn't ideal. After cutting one and checking it's to size, use it to position the saw for the next ones. After cutting, deburr the ends with either a deburring tool, a needle file, or a craft knife again.
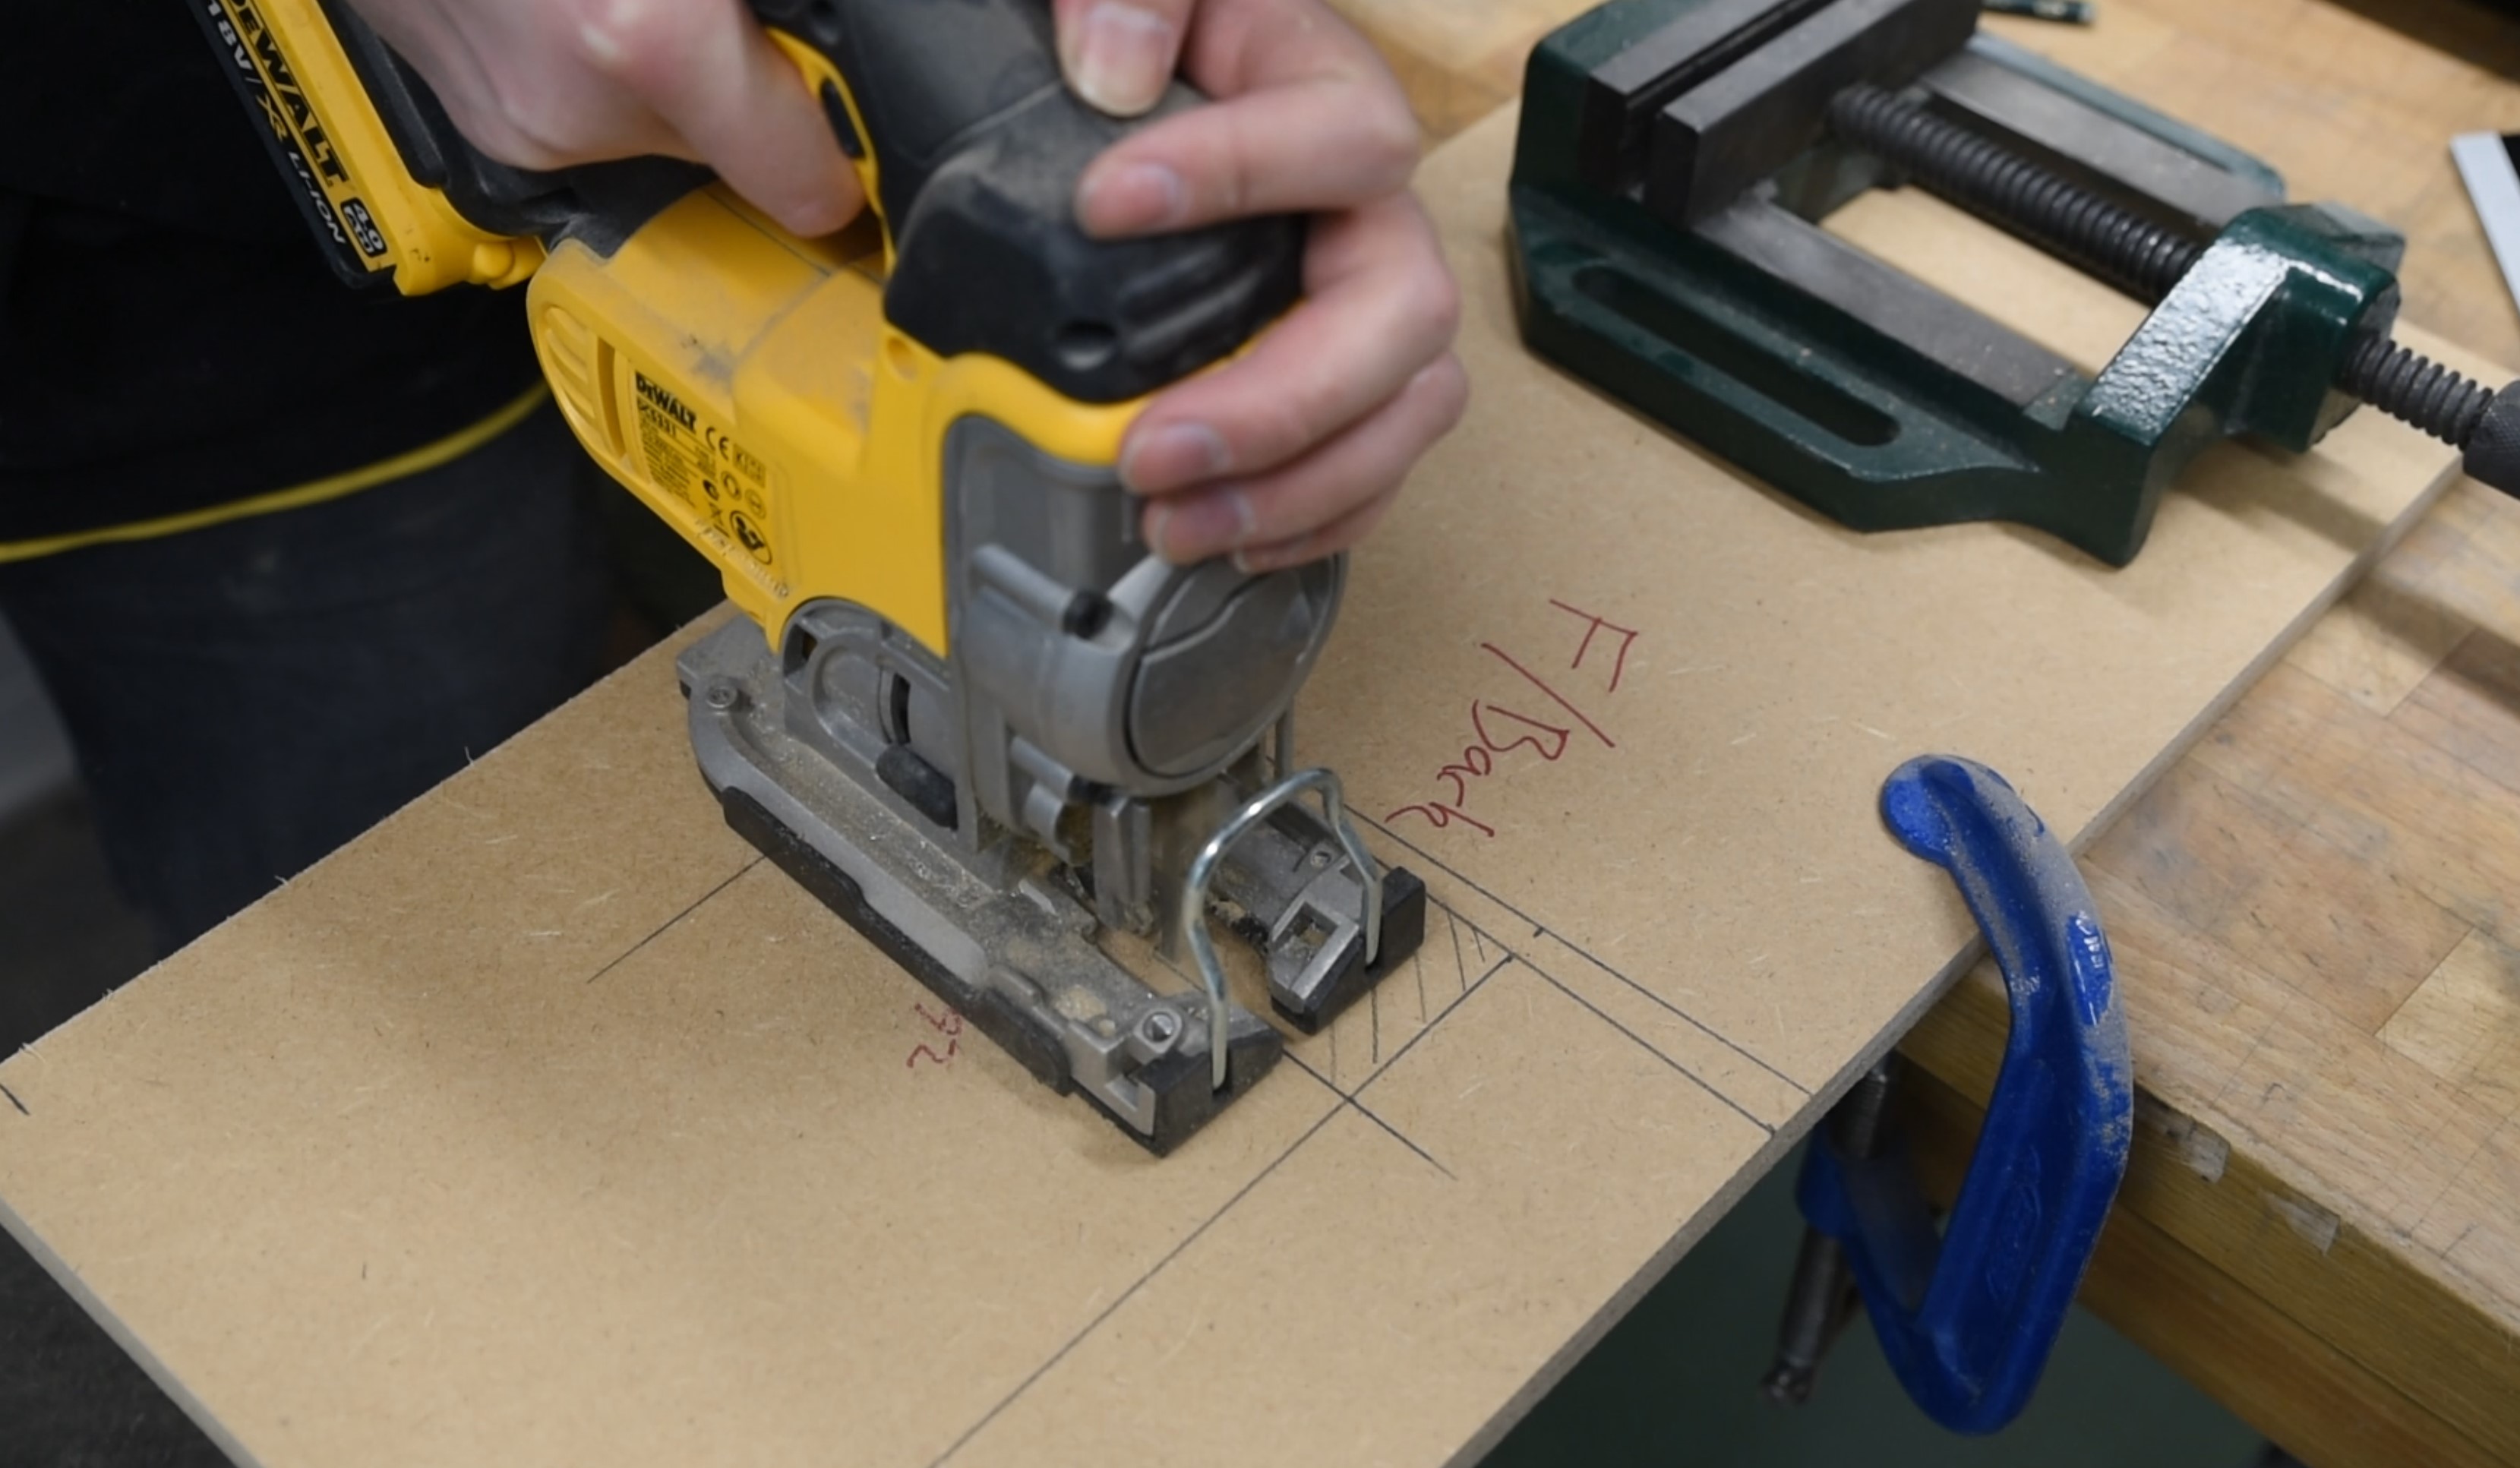
Prep the Panels for Handles and Apply Vinyl
It's so much easier to cut holes for any recessed handles before assembling, so I recommend doing this now. I used a drill and a jigsaw to cut them out, and in order to make sure they're in the same place on both panels I just sandwiched them together and cut at the same time.
N-Case System
With the panels ready, it's time to handle the vinyl. Wipe down the panels to remove dust and cut your vinyl roughly to size (leaving a healthy overlap on the edges), since it makes it easier to apply. If using unbacked vinyl, use spray adhesive to attach it. A squeegee helps to flatten things and push out air bubbles.
If like me you're using self-sticking vinyl like Dinoc, carefully apply to the surface and pat down, removing as much air as you can. You want to do this in one go because otherwise material from the surface will mess up the adhesive. With the vinyl loosely applied, use a heat gun or hairdryer to heat the vinyl, using a squeegee to push out the bubbles that form. This makes the bond much stronger and will leave you with a great finish.
Using a craft knife, trim the edges so that it's nice and neat. The neater the better, as it means it won't catch on the extrusions later.


Generic Corner Braces
If using standard braces, you need to do this in a different order really. Begin by assembling the box; veneer pins are good for this. The reason for this is that it's much easier to apply the vinyl to the case rather than working with coated panels to build the box. I did this the wrong way round the first time, and it was a pain making sure I didn't mess up the finish.


We're not adding extrusions yet, just tacking the box together with small nails so that it holds its dimensions easily later on. Follow the same vinyl steps as the N-Case system once constructed.
Assembly Time!
NCase
This is where N-Case shines. You just tap the extrusions into the corner pieces with a hammer; they should be a nice and tight fit. You can do this in a matter of minutes if you've laid everything out carefully beforehand. I like to do as many of the extensions as possible, then insert the panels at the last moment. Just be sure not to accidentally close off the frame without the panels inside!


Generic
This is the meat of this operation. You now need to add the corner braces to all the edges of the box, then drill and rivet them in place. Be careful when adding the first extrusions, as the box doesn't have much structure at this point. It will get easier as you add them, and don't go to town on the rivets yet; stick to two per side per extrusion, spaced evenly from the edges. You can add more later for strength, but these are for positioning. Do them one by one; don't drill all the holes and just try to rivet it up, as there's a likely chance the case will warp a little as you work with it.
Cover up the corners with corner braces and rivet in place The box should be really sturdy by now.
Both
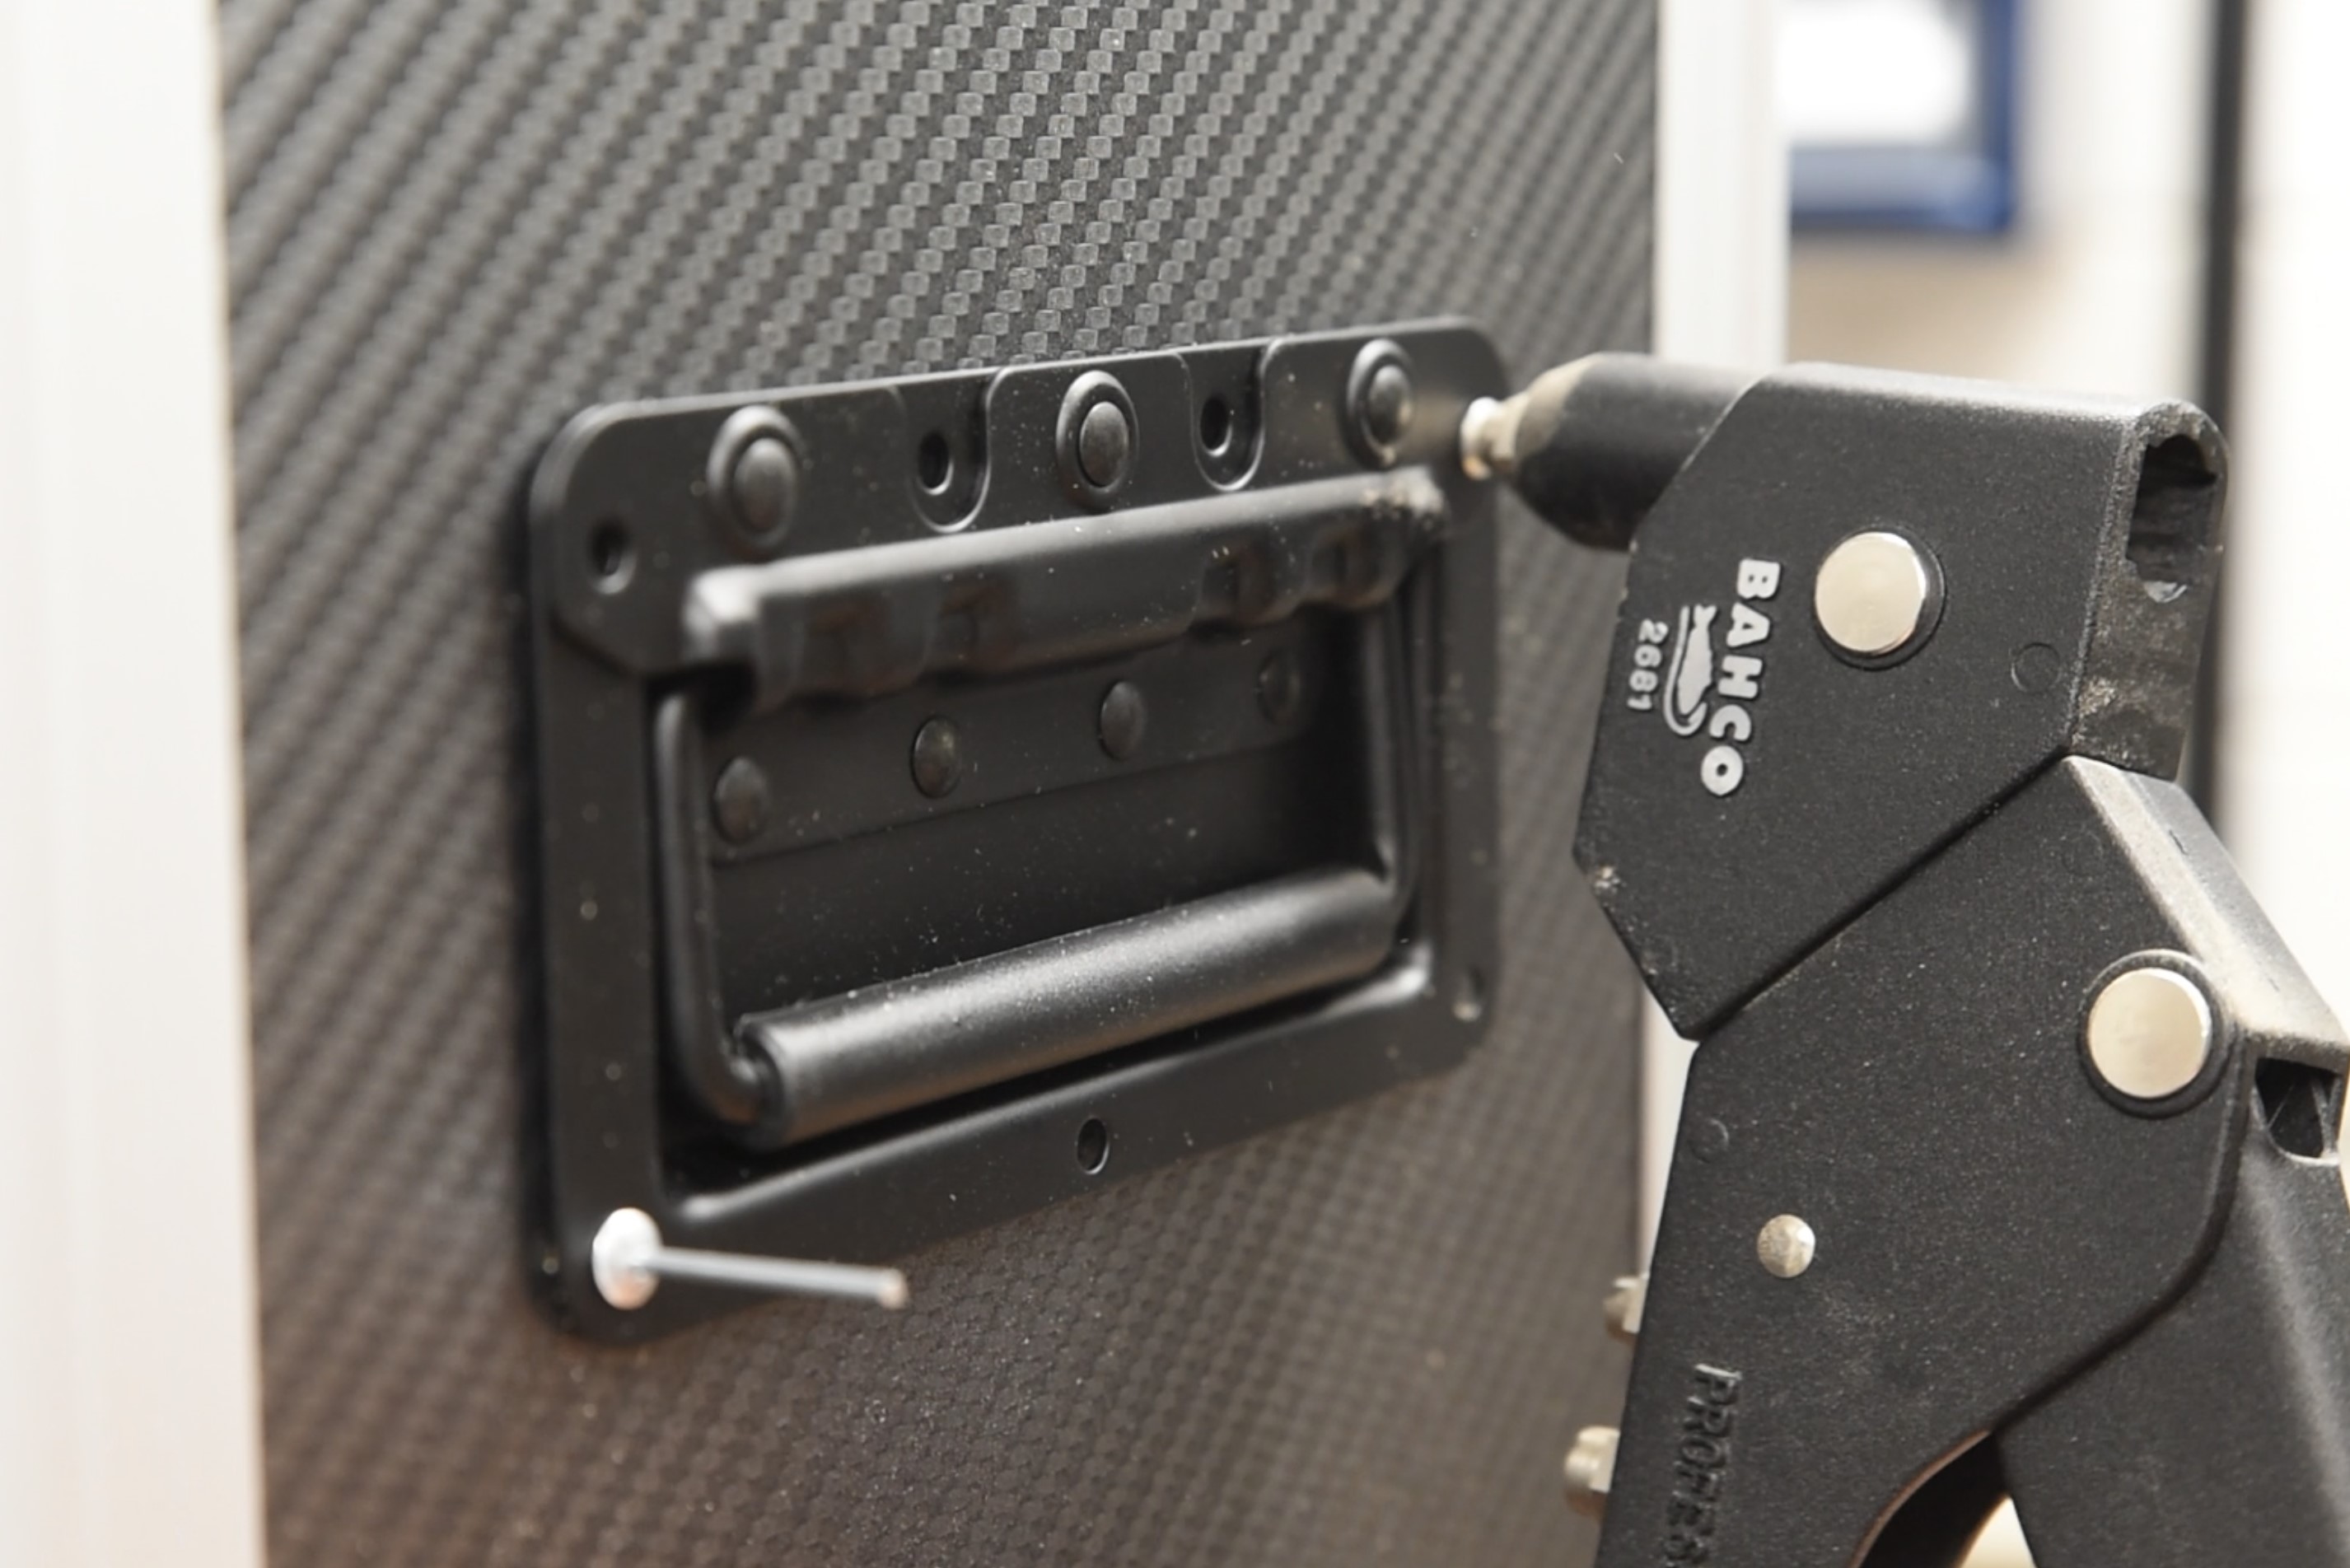
With the extrusions in place you can add the latches, handles, hinges, casters, feet, what have you. For adding the hinges and/or latches, make sure to do this with the box closed, since that way it will still line up when you open it. Most of these features just rivet into place, although some may require screws with nuts and washers on the other side.
Reinforcing
This is an important step, particularly for N-Case. While the corner pieces will provide some strength, under more weight they will just fall out. To get around this you need the aluminium to do the work. Drill holes at strategic points in the extrusions and insert rivets, this will bind the wood panels to the extrusion at that point. By doing this you share the loading across the case, making it significantly stronger. I will usually add 1-2 rivets per side per extrusion for this, and it makes all the difference. For generic extrusions you will need a few more too since they rely on only the rivets to hold the case together.
Line with Padding
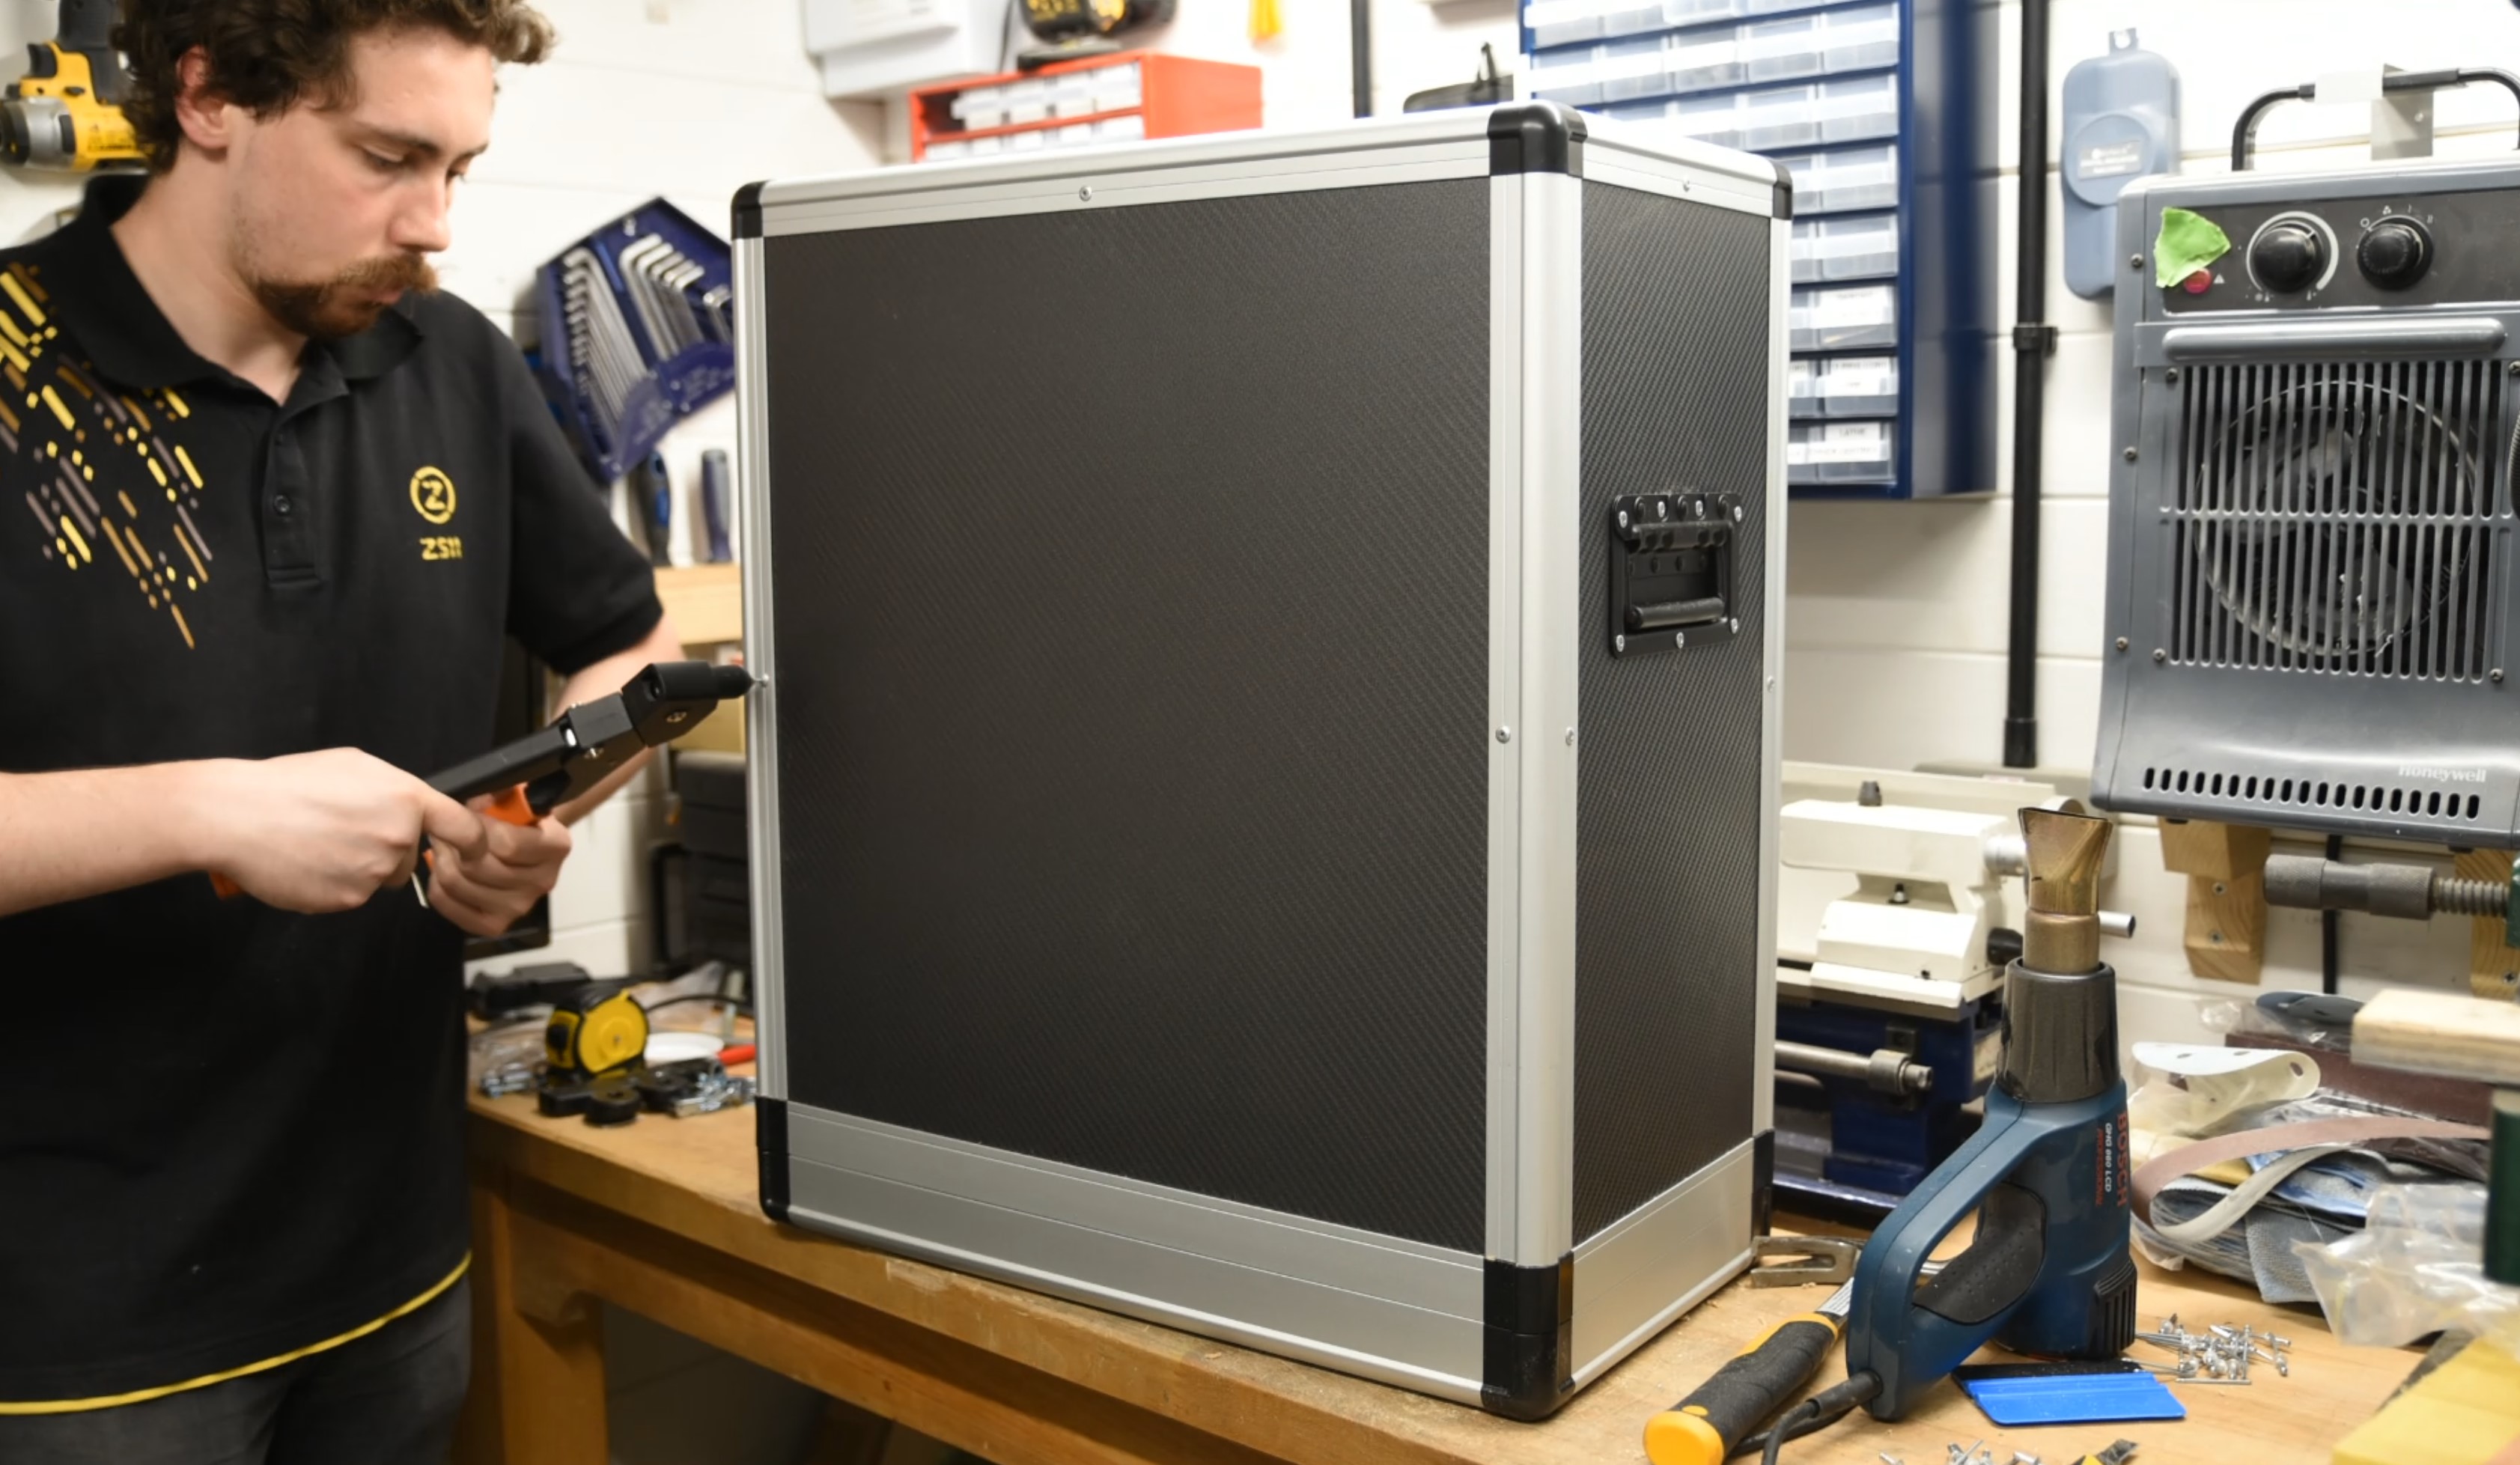
The final step is to line the case with padding. Personally I find the simplest way is to cut the foam a bit oversize and then trim down carefully until it just pushes in. You want it so that the foam can quite happily hold itself in the case without any adhesive. Once all your pieces are cut to size, stick it to the interior of the case using either spray adhesive or double-sided tape. I like the tape method, as it's quick and mess free, plus 3M tape is stupidly strong, so there's no risk of the foam falling out. You're now the proud owner of a fully laden flight case!


It goes without saying this needn't be just for a PC. The same method works for anything else, be it a musical instrument, television you name it. I hope to see any cases you make in the thread discussion!


MSI MPG Velox 100R Chassis Review
October 14 2021 | 15:04


Want to comment? Please log in.